One of the features of our email web client https://webmail.ee is the possibility to create filters for emails on the server level before they end up on the mail account.
Server-level filtering means that emails are filtered before they reach the email account. For example, you can use keywords to move emails to different folders, and this is done automatically across all email applications you use with the same email address.
Logic
Filters only apply to new incoming mail. Filters do not apply to existing mail.
Filters can be applied to one mail at the same time. An exception is the deletion of a email. If a filter deletes an email, no other filter will be applied, except for forwarding the email.
Filters will be applied in the order in which they are listed under settings. If one filter has already specified an action, the other filter will not overwrite it. For example, if a filter performs an action Move to folder X, the second filter in folder Y cannot move it any further. The exception is the spam/not spam flag.
If necessary, filters can be moved to the end of the queue by clicking the Move to end button.
Deleting an email deletes it immediately. If you want the email to remain in the Trash for 30 days, select Move to folder -> Trash as the action.
From, To, Subject, List-ID and message content filter is a partial match, i.e. creating the filter To:ardi means that from LIKE "%ardi%" is searched for. The filter is not case sensitive (affects both Ardi and Ardi). Only text (not html) is searched in the content of the emails.
AND and OR cannot be added to one filter. There are only so-called phrase match.
If several conditions are entered (for example, To and Subject), all conditions must be met in order for the filter to apply.
No (not included) filter can be added.
There is no support for regular expressions (regex).
Creating a new filter
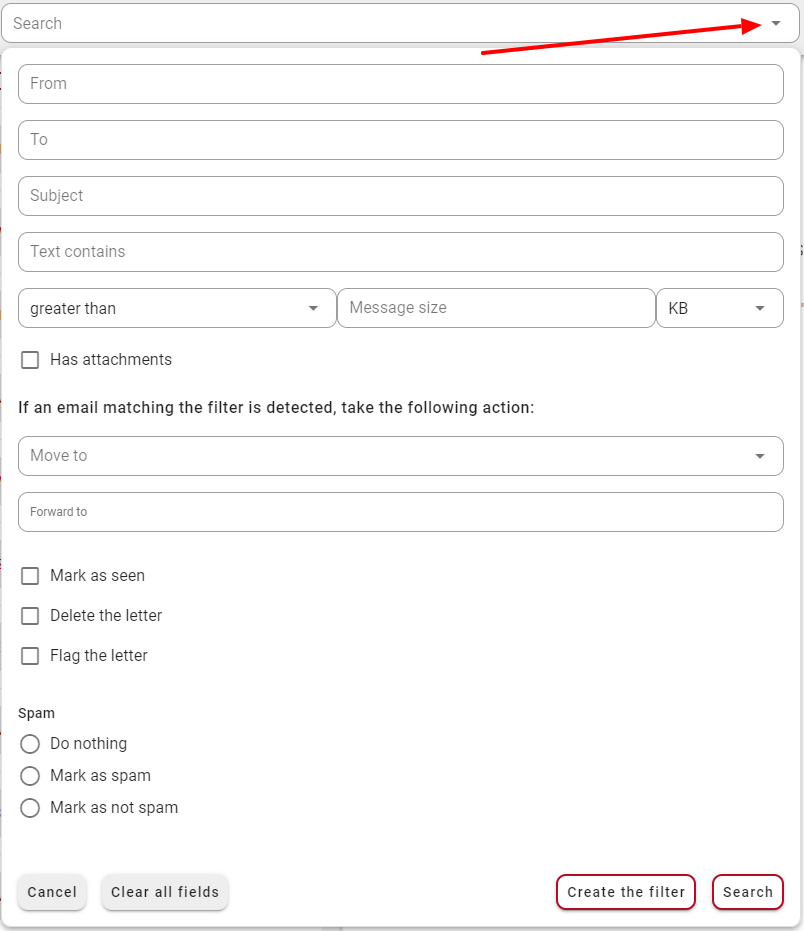
To add a filter, click on the gear icon in the webmail.ee environment and choose Filters. Choose Create a new filter or click on the arrow pointing down symbol on the inner right side of the search box.
This will open a window where it’s possible to create mail filters on different conditions and purposes.
Mail filter conditions
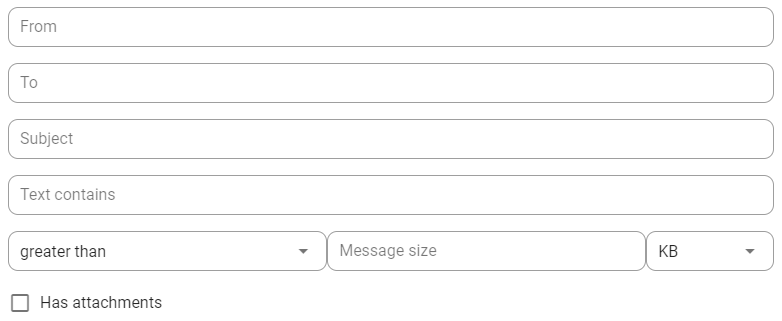
Emails can be filtered under any of the following conditions: From, To, Subject, Text contains, Message size (greater than / less than KB / MB) and Has attachments.
Actions applied to filtered messages
Filters can be assigned to move emails to a certain folder, forward them to another email address, mark as read, delete or mark as important (Flag).
In addition it is possible to set actions related to spam: Do nothing, Mark as spam, Mark as not spam.
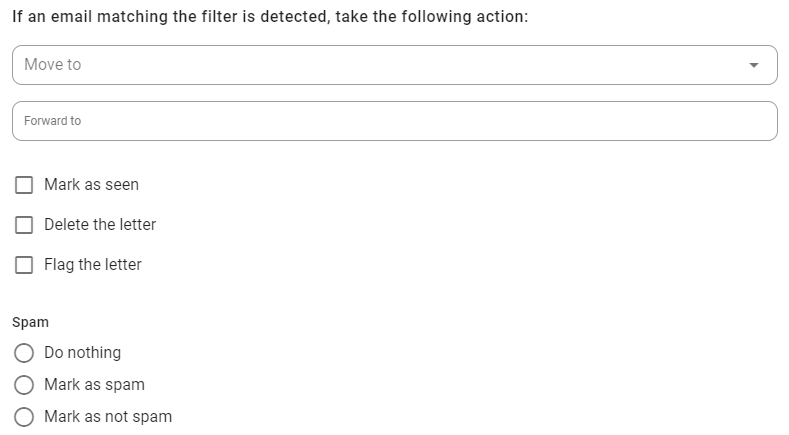
By not choosing any spam related setting while creating a filter, the ”do nothing” option will be set automatically.
Examples
Moving an email containing a keyword to another folder
Let’s say an email user wishes to move all incoming paychecks to some other folder than INBOX.
They can do so by first entering ”paycheck” in the Text contains box. Then, since paychecks are usually sent as file attachments, they can but do not necessarily need to tick the Has attachments box. Finally under the Move to dropdown menu they will need to select the folder they wish the emails to be moved into.
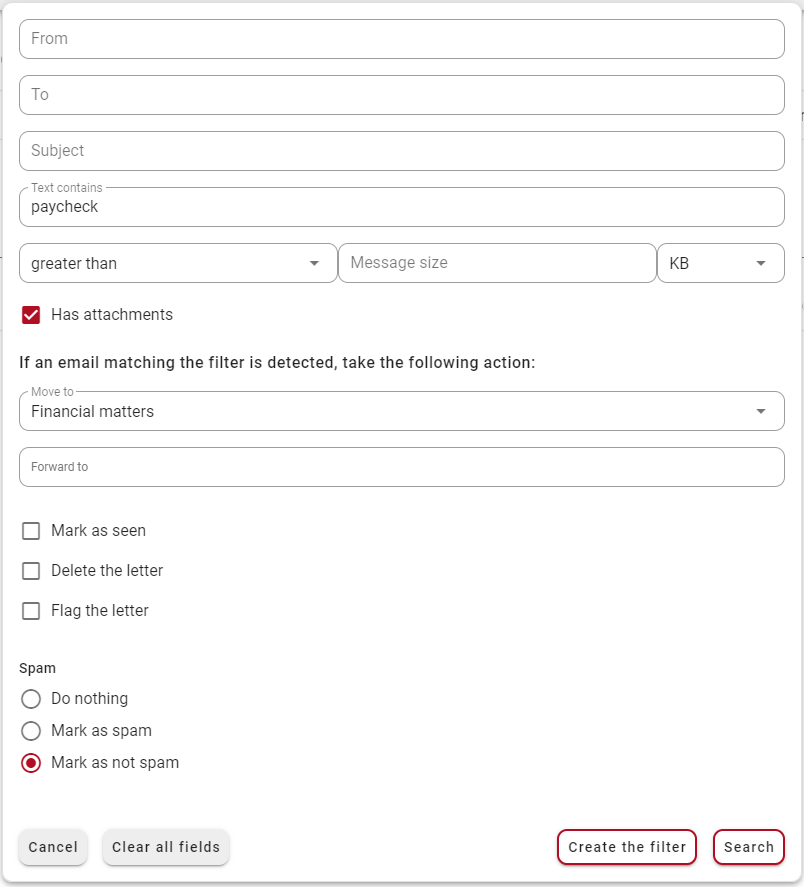
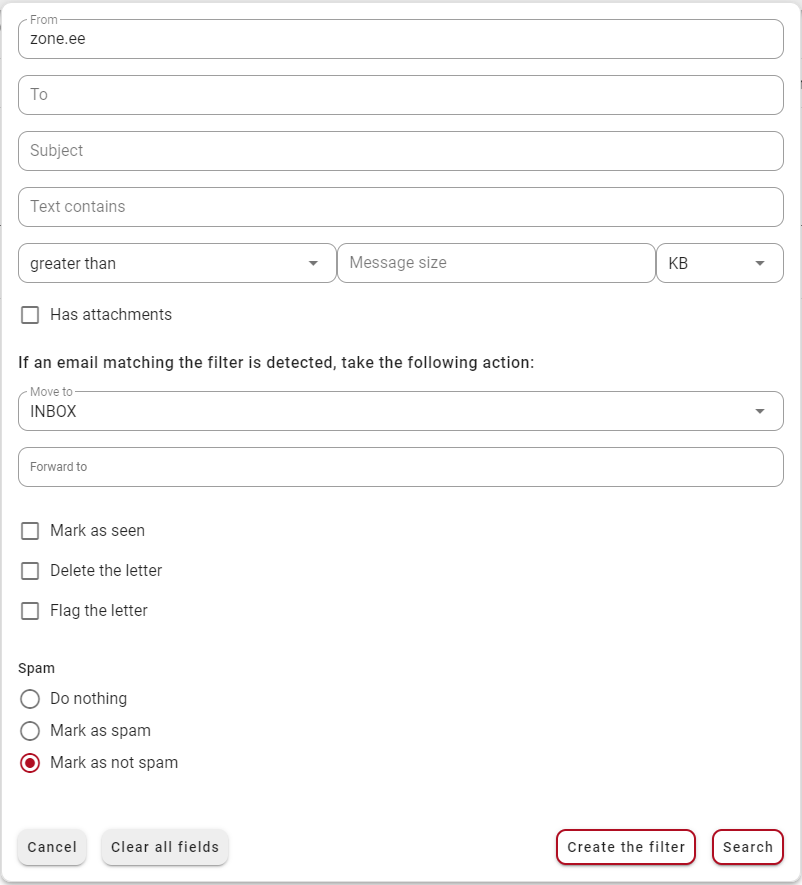
Allowing letters from a certain address to come through clean
In order for all emails coming from zone.ee to come through clean without the spam filter intervening:
Enter ”zone.ee” in the From box, then choose Mark as not spam under the spam related settings. Finally click on Create the filter.
Filter management
To view filters in webmail.ee, click on the gear icon and select Filters.
User-created mail filters can be edited, disabled and deleted. Disabling a filter will turn it gray in the list and not be applied to emails that meet its conditions.
