Our web servers can also host Node applications.
Node is automatically installed on the servers and uses the latest LTS (Long-term support) version by default. If you want to deploy a newer or older version of Node, please see the Changing the Node.js version article.
In order for the Node application to work, you need to make the domain listen to the application from another port, either via mod_proxy or port forwarding.
For applications using WebSocket connections, mod_proxy does not work. For these, port forwarding is required
Uploading application files to the server
Create or install the application file(s) on the main or subdomain of the server.
You can do this from the file manager (WebFTP), from a separate FTP client program, or via SSH connection.
In our example, we have created the subdomain ”test”, and a new file named app.js in the directory of this subdomain. We then pasted the Hello World application script from Node’s official “Getting Started” guide (and specified 8080 as the port to listen on in the script):
const http = require('http');

const hostname = '127.0.0.1';
const port = 8080;

const server = http.createServer((req, res) => {
res.statusCode = 200;
res.setHeader('Content-Type', 'text/plain');
res.end('Hello World');
});

server.listen(port, hostname, () => {
console.log(`Server running at http://${hostname}:${port}/`);
});
Configuring the application with mod_proxy
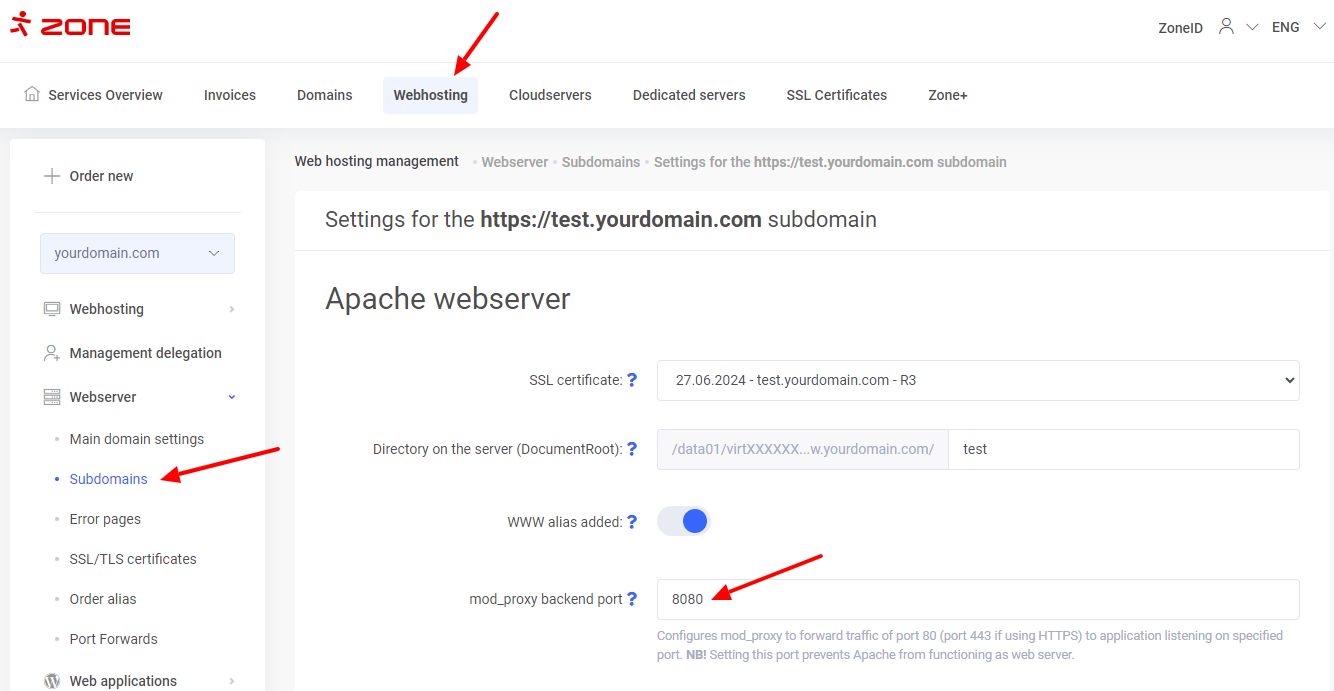
Now you need to prepare the domain from which you want the application to open.
To do this, go to the My Zone control panel, under Webhosting, and open either Main domain settings or Subdomains (depending on where you are installing the application), and click on the Modify button.
In the mod_proxy backend port field, enter the desired port from which the server will listen to the application (8080 in our example). The port can be between 1024 and 65535.
To make sure the app is running, you can connect to the server via SSH and run the node file-name command (in our example, node app.js) in the folder containing the app:
![]()
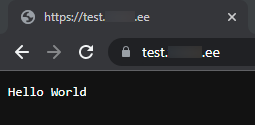
When you visit the domain where you installed the app in your browser, you should also see the contents of the app:
NOTE: If you now disconnect from the server via SSH, the application will stop working again, and you will receive an error message 503 Service Unavailable when visiting the domain in the browser.
In order for the application to start automatically and stay running, it must be configured as a PM2 application on the server.
PM2 application setup
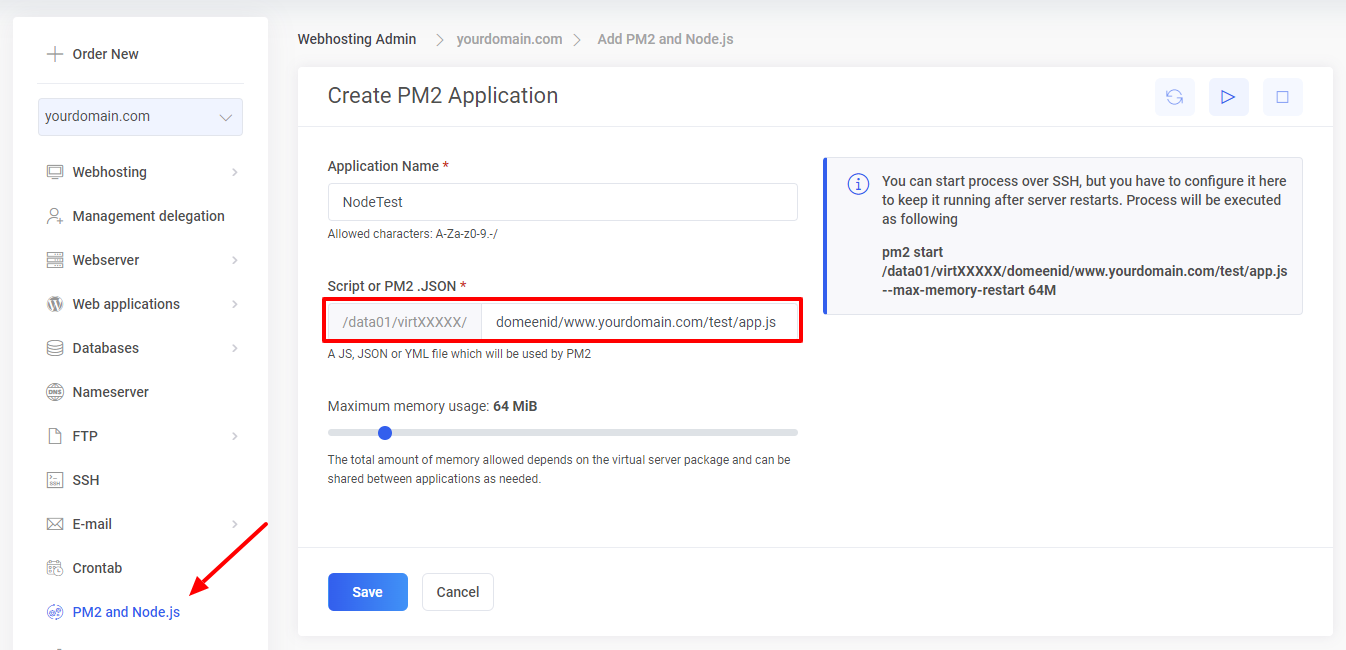
In the My Zone control panel open Webhosting → and click .
Give your application a name and in the field, enter your script file path (this is where the DocumentRoot from the domain comes in handy, which we recommended copying to a separate text file in the previous section of the article).
Set the maximum memory usage for the application and click on .
Make sure the newly launched process is Active, wait about 5 minutes, and then try to visit your application in your browser.
Configuring an application with dedicated IP by port forwarding
To enable port forwarding, a dedicated IP address is required, which means you need to have the Pro web hosting package. If you are using the Pro web hosting package, please contact our customer support to activate the included dedicated IP address.
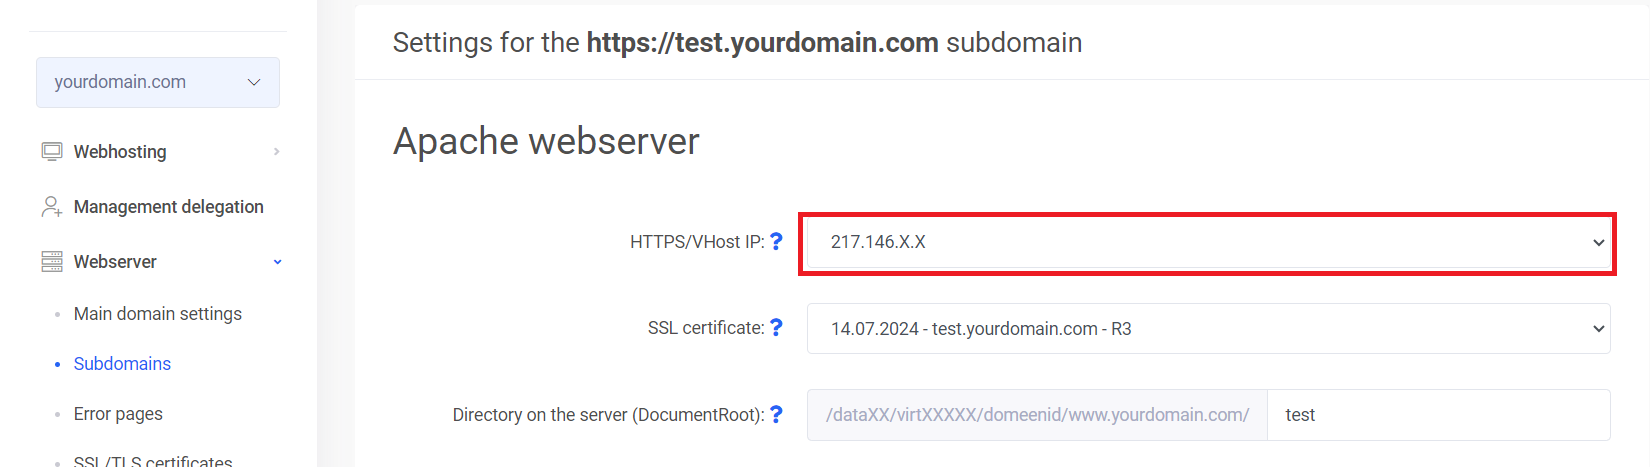
Once the dedicated IP address is activated, assign it to the (sub)domain where you are installing the application. To do this, go to My Zone control panel and navigate to Webhosting → Webserver, then select either the Main Domain Settings or Subdomains, depending on your setup, and under the appropriate domain, click Edit.
On the page that opens, the first option is HTTPS IP address – choose your dedicated IP from there and save the changes at the bottom of the page.
If you haven’t yet uploaded your application files to the server, we recommend doing so now. Also, set up a PM2 process that will launch and keep the application running automatically. (Instructions can be found by scrolling up a bit).
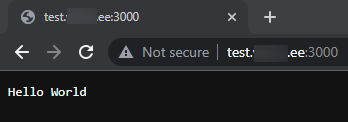
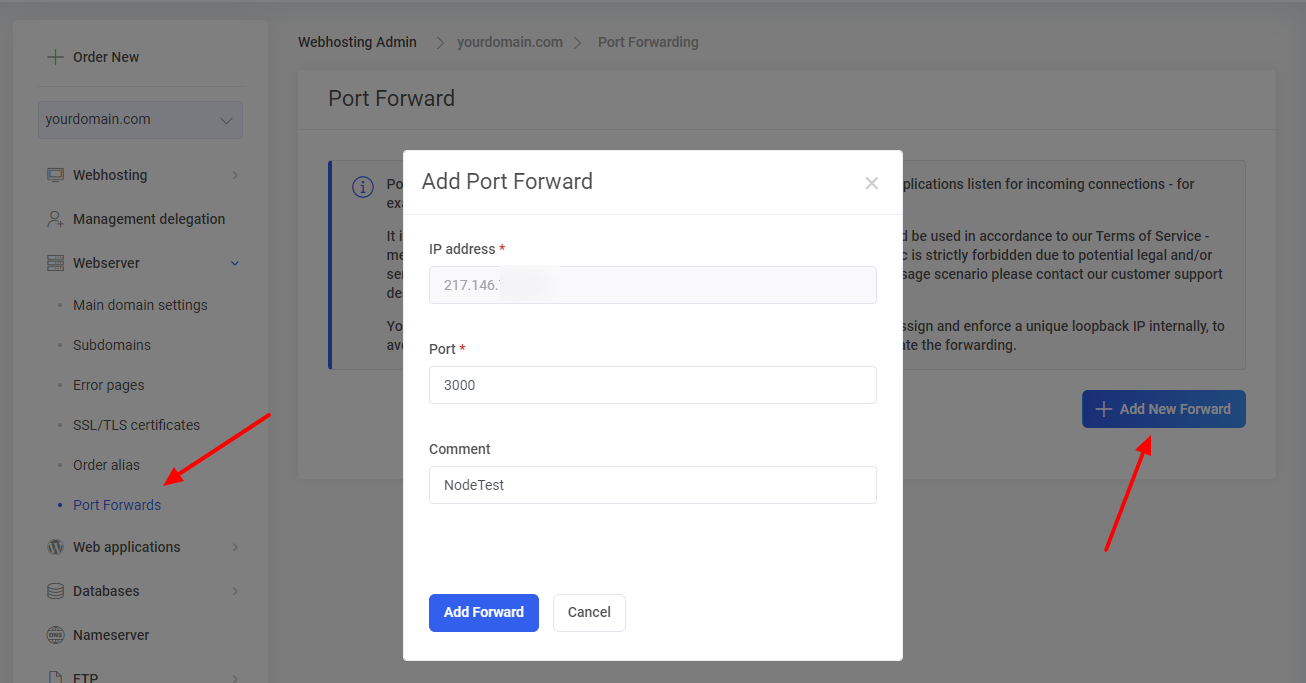
Then, open the Port Forwarding section from the Webserver menu and click on Add New Forward. Specify the desired port and add a comment. In our example, the port is 3000 and the comment is ”NodeTest”.
After port forwarding, wait for 10 minutes, then try accessing your application in a web browser. In the address bar, append a colon followed by the port number to the end of the URL (in our example, :3000).