Windows 11
SSH is installed by default on Windows 11. In order to establish an SSH connection, you must first generate private/public key pair, the public key must be added to the My Zone control panel. The private key will remain on your computer, which should be protected so that it does not fall into the hands of a third party.
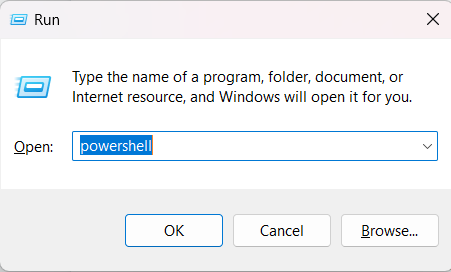
Start Windows Powershell. To do this, press the Windows key + R. In the window that opens, type powershell and press OK, or open the Start menu and type powershell.
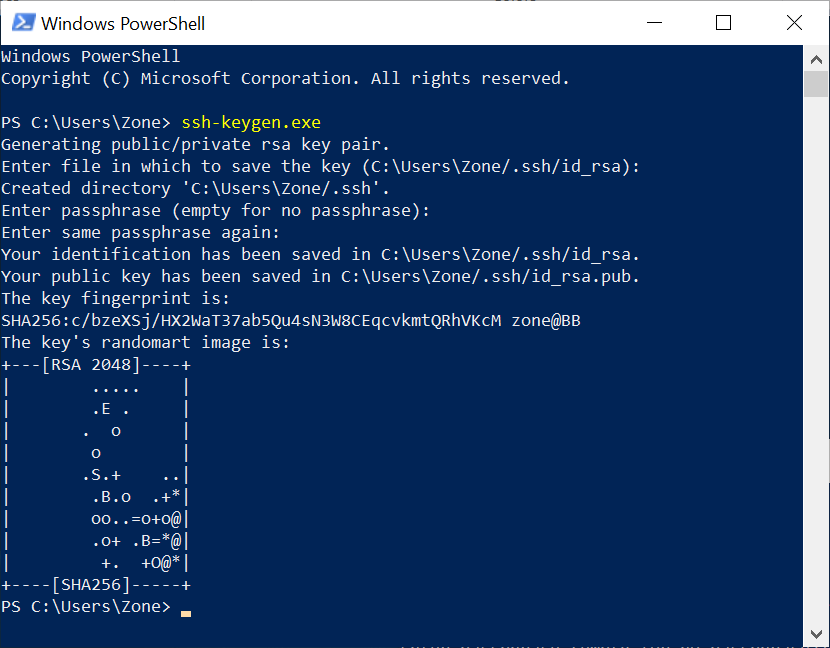
In the terminal window that opens, type ssh-keygen.exe
You will then be prompted for the private key filename (you can leave it as default and just press Enter) and the password twice. The password can be left blank, but it is still recommended to set a password for security reasons.
Next, we copy the public key to the buffer. The public key is located in the .ssh directory in a file named id_rsa.pub. You can see the contents of the file by typing cat .ssh\id_rsa.pub in the console. Use the mouse to select the contents of the private key (starts with ssh-rsa and ends with username@computername). To copy it to the buffer, press Enter or right-click on the selected text.

Now enter the My Zone control panel and open the desired web-hosting management.
From the menu on the left, click on the SSH.
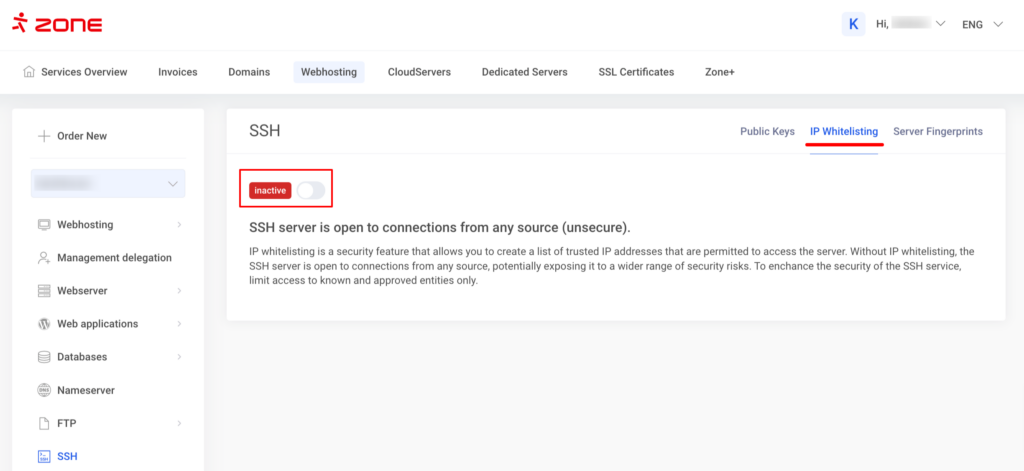
In the IP Whitelist option, you can specify whether the SSH access of the corresponding user is allowed from any source or limited to trusted IP addresses.
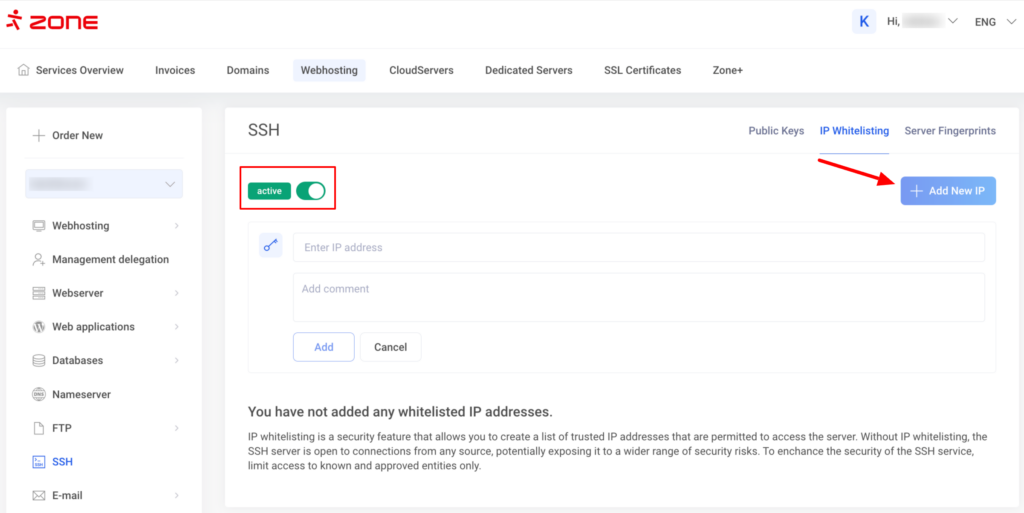
If you want to restrict access by IP address, activate IP restriction by clicking on the button. To add an IP address, click + Add new IP, enter the IP address and add a comment.
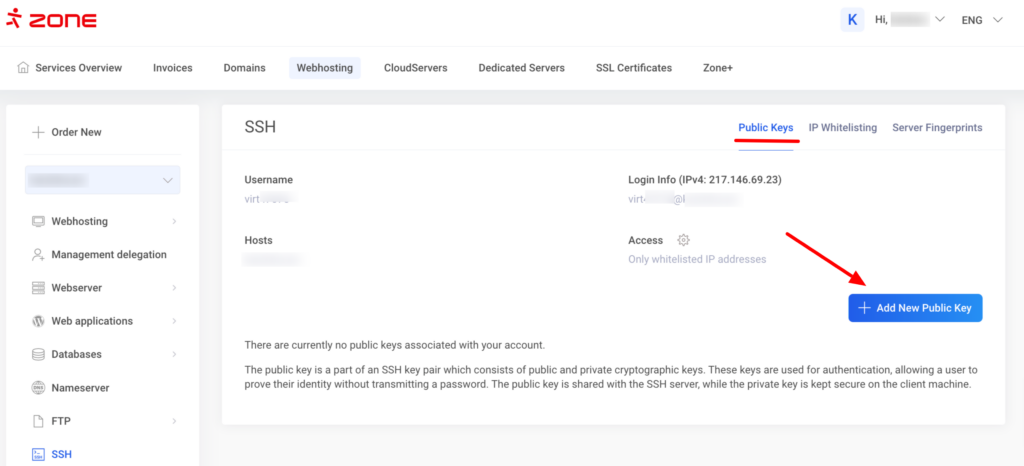
In the Public keys menu, you can add a new public key by pressing + Add New Public Key.
In the Enter key box paste the contents of the id_rsa.pub file from the buffer, add a comment and click Add. The comment can later be used to identify the owner of the key so that the key can be removed if necessary.
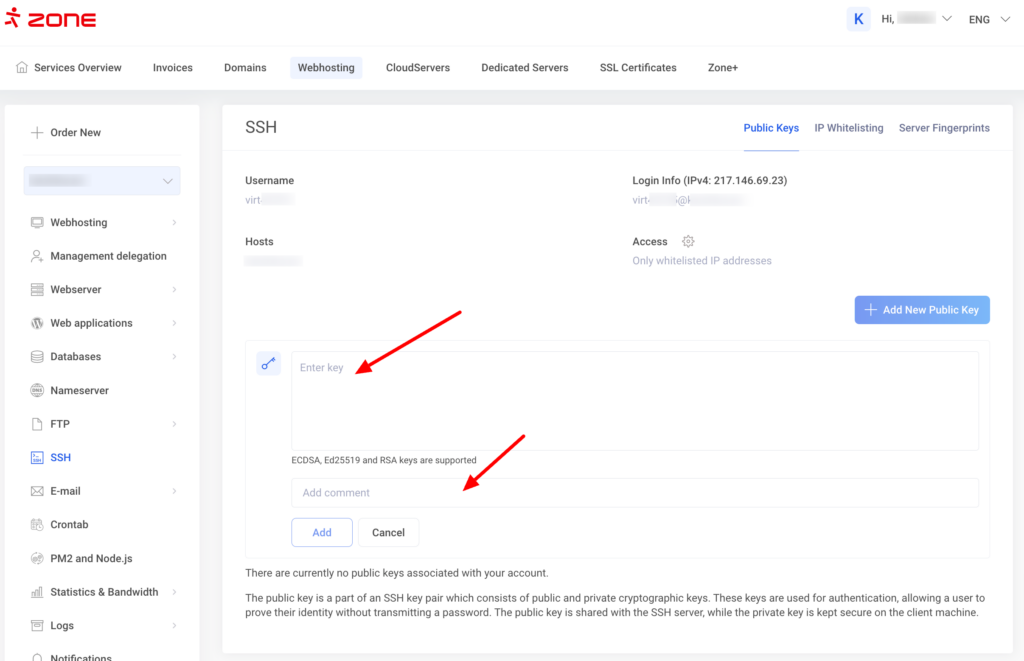
Click Add. The key will arrive on the server within 10 minutes.
After 10 minutes, you can try to connect via SSH.
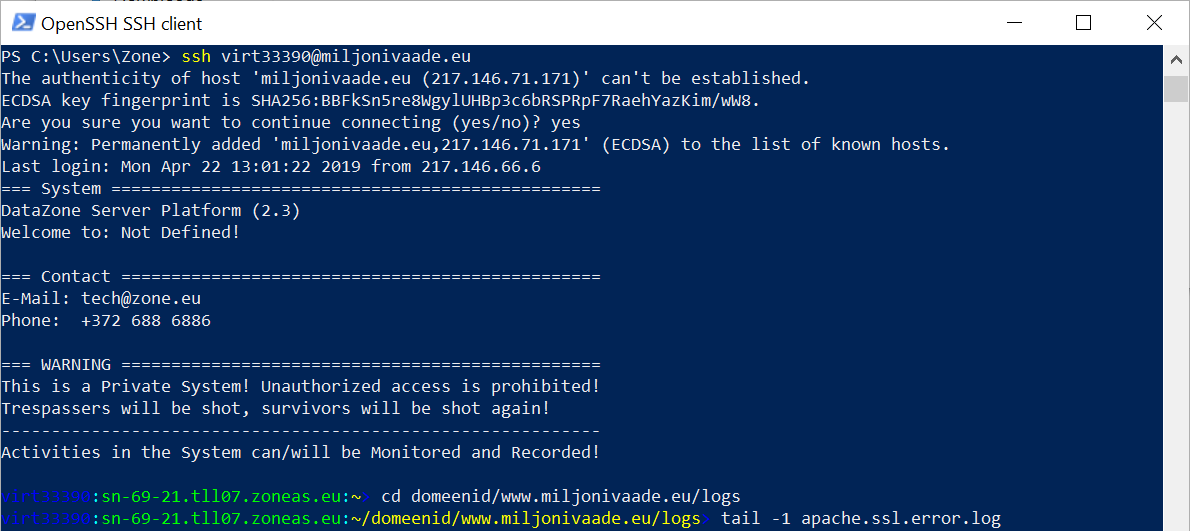
The SSH username is in the form of virt + number. For example virt33390. The login information can also be seen on the SSH access page.
Now type in the Powershell window: ssh username@servername. The first time you connect, you will be asked if you trust the server’s fingerprint. Type yes and press Enter. You should now be logged in.
Putty
Creating an SSH Key Pair Using PuTTYgen
To establish an SSH connection, you must first generate a key pair, the public part of which must be added to the My Zone control panel. The private key remains on your computer, which should be protected to prevent it from falling into the hands of third parties.
It is possible to add keys of type EdDSA, ECDSA or RSA through the My Zone control panel. In this guide, a key pair of type EdDSA (also known as Ed25519) will be created.
Run the PuTTY Key Generator PuTTYgen, select EdDSA as the key type and click on the Generate button.
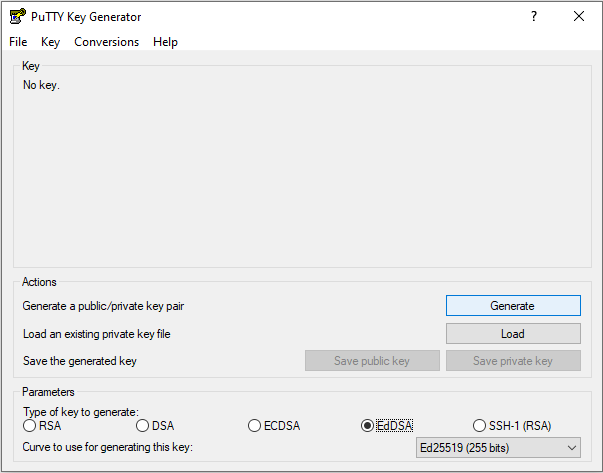
It is advisable to enter a comment in the Key comment text box to identify the key later, e.g. the name of the virtual user or the hostname.
It is also recommended to add a password for the security of the private key in the text box Key passphrase and repeat it in the text box Confirm passphrase.
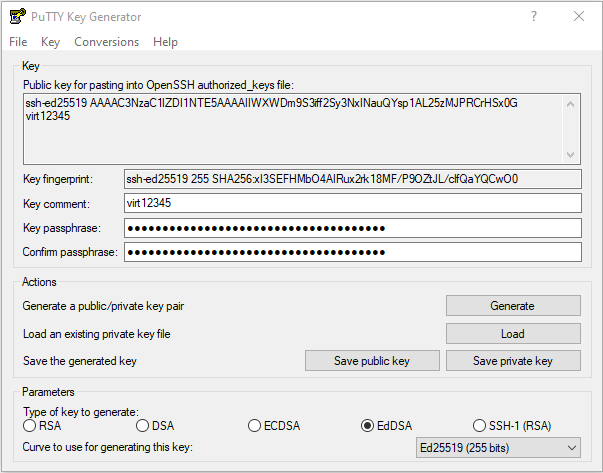
Save the public and private key to your computer by clicking Save public key and Save private key.
By default, PuTTY Key Generator saves the public key in PEM format.
The public key added via the My Zone control panel must be in SSH1 format.
A public key in SSH1 format can be copied from the top text box of PuTTY Key Generator. In the upper text box, copy all the text whose content starts with “ssh-ed25519”.

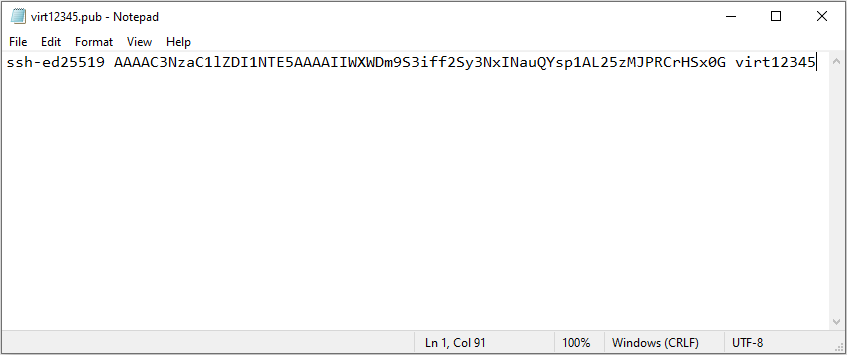
Using a text editor (e.g. Notepad), open the newly saved public message file, delete its contents and paste the copied SSH1 format public message contents into the file and save the change.
Upload the public key via the My Zone control panel, following the Windows 11 instructions above.
Establishing an SSH connection with PuTTY
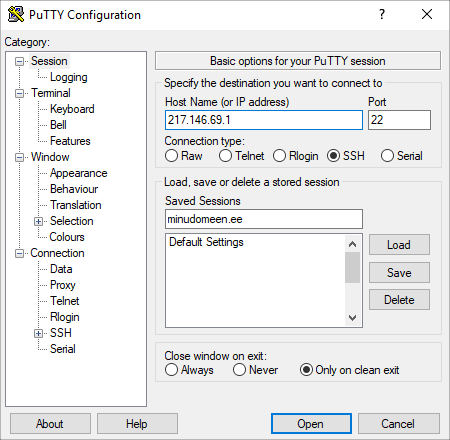
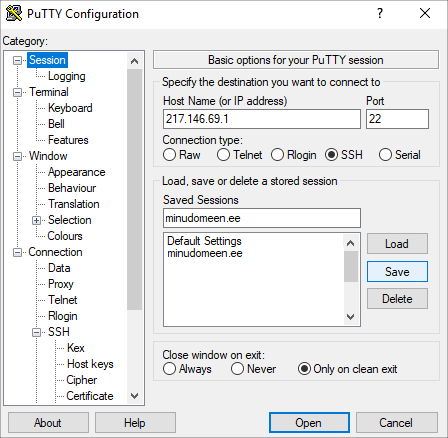
Run PuTTY and save the session data so that you can quickly establish an SSH connection later.
Enter the hostname or IP address of the server and name the session in the Saved Sessions text box.
The IP address of the server can be found in the My Zone control panel on the Webhosting page by selecting Webhosting → System Information → IP-address. It is recommended to use an IP address – this will avoid situations where a host or domain name does not resolve to IP due to DNS problems or domain expiration.
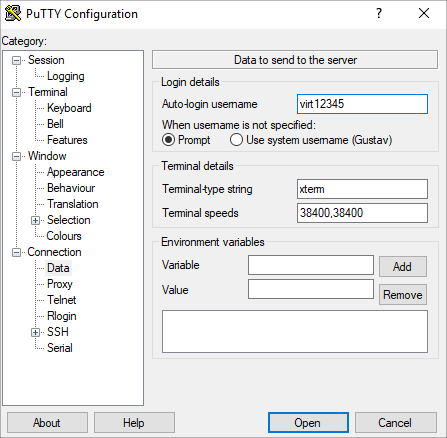
In the category tree on the left, select Connection → Data and enter the name of the virtual user in the Auto-login username text box.
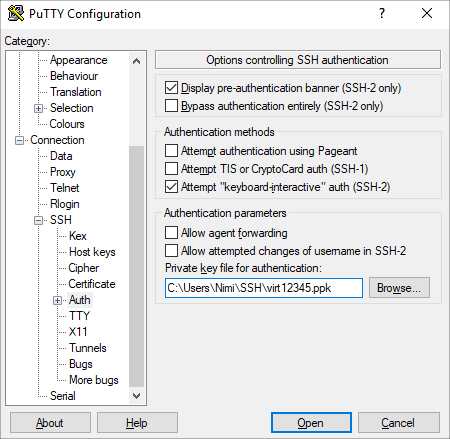
From the category tree on the left, select Connection → SSH → Auth and select the Private key file for authentication by clicking the Browse button.
Select Session from the category tree on the left and save your session data by clicking Save.
Now the necessary data to establish an SSH connection has been saved and you can establish an SSH connection to the server by clicking the Open button.
Read more:
How to view disk space usage and the number of files (inodes)?
Detecting slow PHP requests
Using Mytop to monitor MySQL/MariaDB load