If you want to temporarily restrict access to your website, one way to do this is to use the .htpasswd and .htaccess file combination.
The end result is that the visitor sees a login form displayed by the browser instead of a web page.
Allowing access to a single user
Log into your My Zone and open your webhosting packages file manager (click the Files button in the shortcut of Web and Email box).
Create a new file called .htpasswd (there must be a dot in front of the name!). The file should preferably created in the directory that opens.
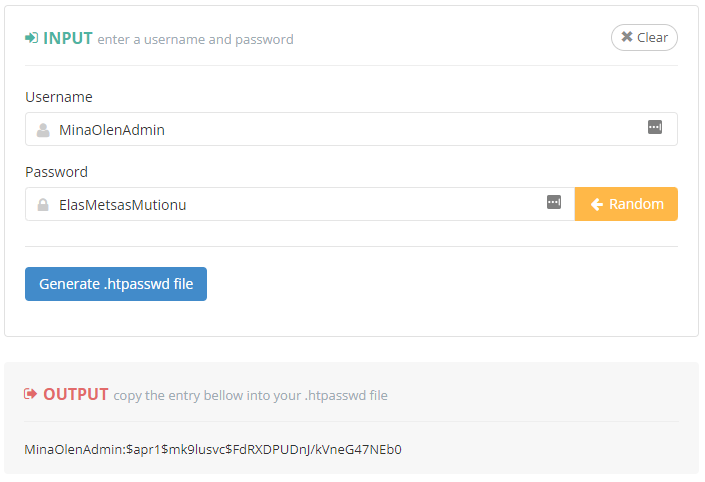
Open the .htpasswd password generation tool and use it to generate your desired credentials. Copy and paste the text string from the OUTPUT field into the newly created .htpasswd file.
![]()
Save your changes from the bottom right Save button.
Next, open the root directory of the website. The root folder is htdocs, if the website is on the main domain, for example domain.ee. If the website is on a subdomain, then it is the subdomain folder.
Create a new file called .htaccess if such a file does not already exist.
Add the following lines into the beginning of the file:
AuthUserFile /path/to/.htpasswd
AuthType Basic
AuthName "Restricted webpage"
Require valid-user
Replace /path/to/.htpasswd on the first line with the full directory path of the .htpasswd file (so that the last line is still /.htpasswd) and save the changes.
If you created the .htpasswd file in the same directory as the one that was first opened, then that directory is the root directory of the server. You can find the full file path to the server’s root directory on the last line of your server’s System Information page.
Allowing access to specific usergroups
It’s also possible to allow access to the website for only specific users, when the .htpasswd file contains the access details of many different users.
This can be done by creating a new file where you enter user groups in the form group name: username username2 username3, one group per line.
![]()
Then, in the .htaccess file, modify the value of the Require directive line to: group group name. Also add a new line to the file with the directive AuthGroupFile, which must be the full directory path of the group file, i.e. the location of the file on the server. Save the changes.

A bit more technical
.htpasswd password generator
Passwords in the .htpasswd file must be encrypted. The easiest way to get the passwords in the correct form is to use the following .htpasswd password generation tool.
The disered username and password must be entered into the INPUT form (r let the form generate the password for you). After this press Generate .htpasswd file.
A text line will appear in the OUTPUT field after pressing the button. This must be copied. The text line is formatted in the style: username:encryptedpasswordand must be pasted into the .htpasswd file in this format.
.htpasswd file contents
The contect of the .htpasswd file is very straightforward – all you need to do is enter the access data in the following form: username:encryptedpassword. One user must be per row and the password must be encrypted.

.htaccess file contents
In order for a website to be able to restrict access to a page at all and to display a login form to the visitor, you need to create the appropriate references in the root directory of the website or add references to an existing .htaccess file.

AuthUserFile directive
AuthUserFile tells you where the file containing the user’s access information is located. This value must be set as the full directory path of the .htpasswd file, i.e. the location of the file on the server.
In our example, the .htpasswd file is located in the same directory as the .htaccess file (subdomains restricted.miljonivaade.eu root directory). For security reasons, it is strongly recommended to place this file in a directory that does not resolve to the web. For example to /www.yourdomain.ee/ directory … or better yet – to a directory at the same level (this can be done via SSH).
The full directory path of the root directory of your website can be found in MyZone → Webhosting → Webhosting →Main Domain Settings or Subdomains page respectively.
AuthType directive
AuthType or authentication type can be None, Basic, Digest or Form. For more information on authentication types, see the Apache documentation.
AuthName directive
The AuthName value used to be displayed in the login form, but now its only function is to distinguish authentication fields. Thanks to this directive, a person who has already been authenticated will not be asked to log in again if there are several websites on the server requiring authentication with the same AuthName value.
Require directive
The Require Directive in the fourth row, allows you to specify under which assumption the login attempt is successful. For example, in the case of valid-user, it is sufficient that the visitor enters the correct username and password that match the data in the .htpasswd file.
It is also possible to allow access on a group basis so that only certain users who have been entered into the .htpasswd file are allowed access to the page.
In this case, the Require value must be in the following form group GroupName.