Sometimes there are situation, when you need to view a website before redirecting a domain to it first. For example, when migrating your website onto a virtual server at Zone and wishing to ensure the website works as it should before connecting your domain to it, or when you’re developing a new website on another server.
One way is to change the hosts file on your computer.
Hosts file allows you to specify the exact IP address of the server from which your local computer is requesting information about a particular website.
Hosts file editing example
For example, you have a website example.com that you’re migrating to a server at Zone.
To ensure that the website works before redirection DNS records, you must specify the IP address of the new server and the domain name in hosts file.
For example:
38.25.63.10 example.com
38.25.63.10 www.example.com

After saving the file, open your web browser and refresh the page. The website should then open from the IP-address you specified in the hosts file. We recommend opening the website in incognito mode to avoid the browser’s cache intervening the site’s loading cycle.
To undo the changes either comment out the lines out by adding a # symbol in front of them or by completely deleting the added text!
Where to find the hosts file?
Windows 10 and 8
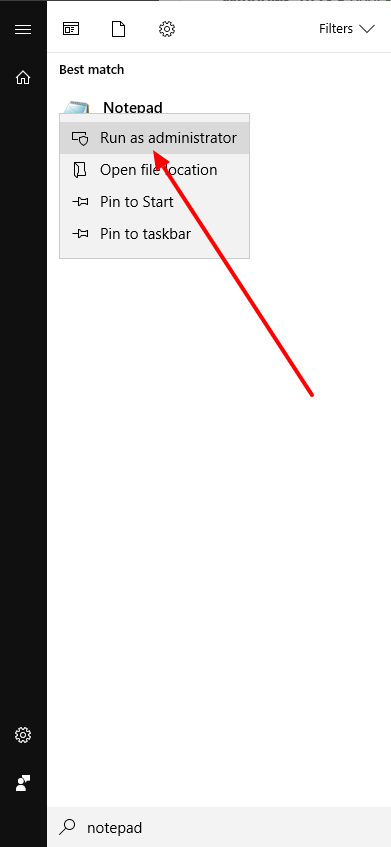
- Press the Windows key on your keyboard, to open the “Start” menu and type ‘notepad‘ into the search bar
- Right click on the notepad icon and choose “Run as administrator“

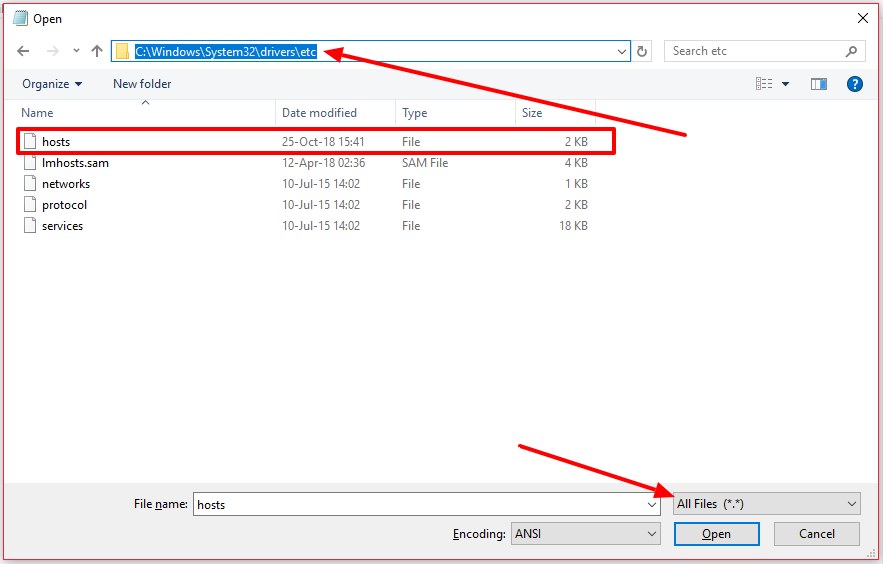
- After opening Notepad choose “File” -> “Open..” and paste the location of your hosts file , which by default is: c:\Windows\System32\Drivers\etc\
Mac OS
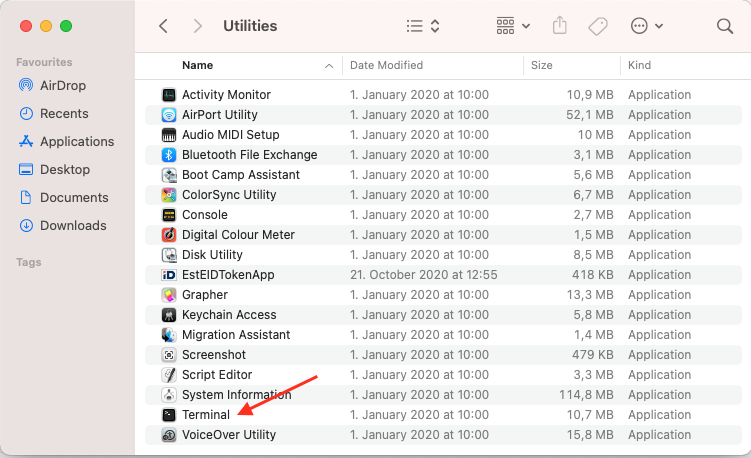
- Open the Mac Terminal. Open the Finder, and go to Applications > Utilities > Terminal.
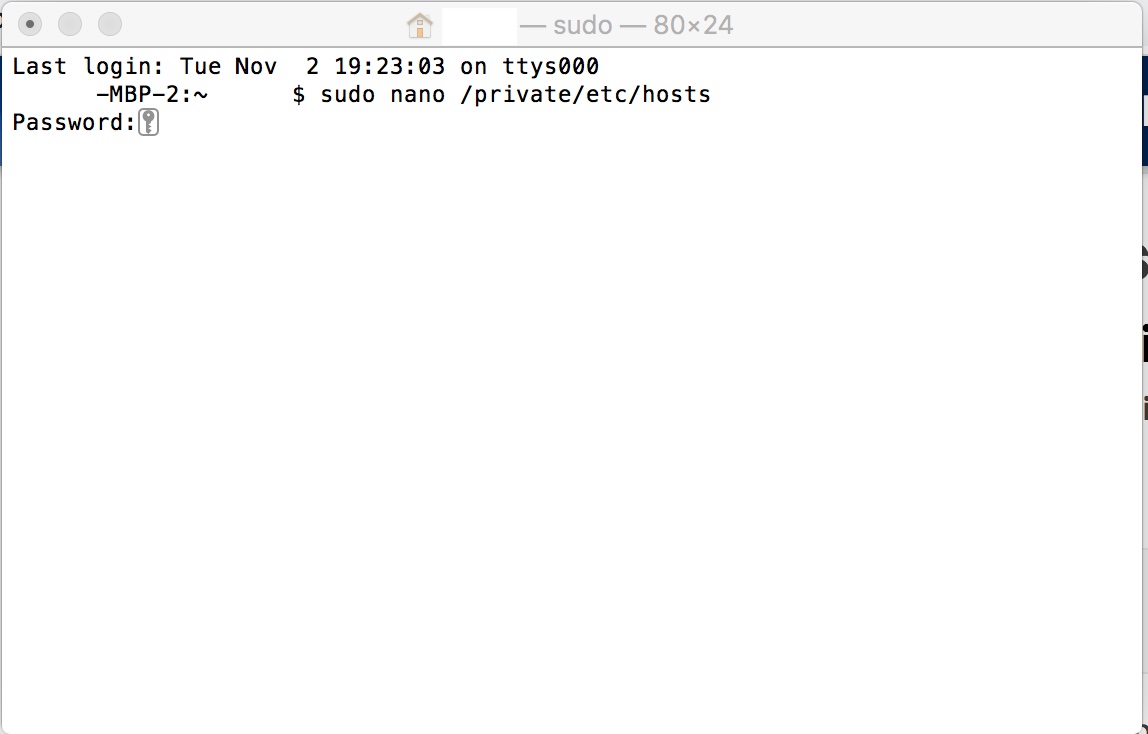
- Type
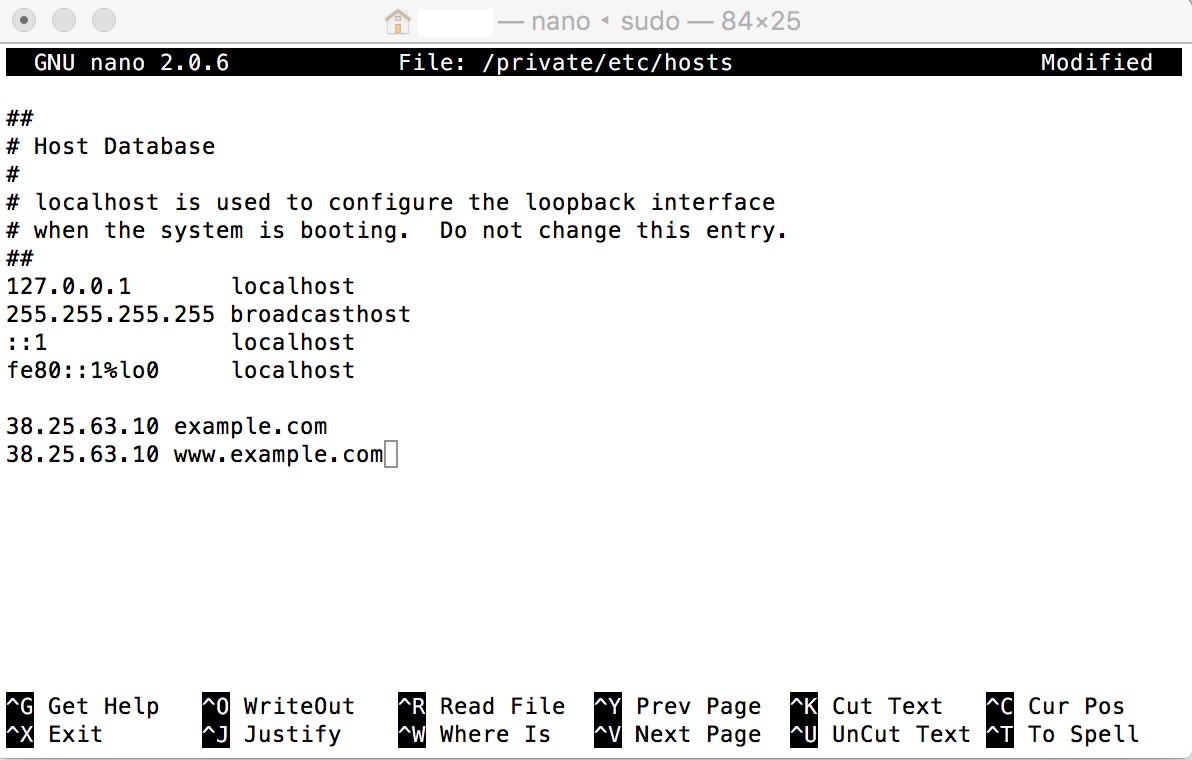
sudo nano /private/etc/hostsin the terminal window, enter user password and hit Enter.
- In the host file, first enter the IP address and then the domain name.
For example:38.25.63.10 example.com 38.25.63.10 www.example.com
 Save your changes by pressing
 Command + O, then exit by pressingCommand + X.- In Terminal, type
sudo killall -HUP mDNSResponderto clear your Mac’s DNS cache. This will prevent any clashes between DNS and the Hosts file.
In order to undo the changes, repeat the process above and simply delete the previously added rows.